
High torque starter motor installation guide for Lotus Elan and Elan +2
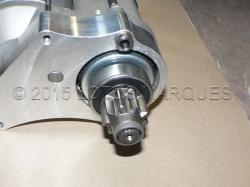
This compact high torque starter motor weighs in at 3.9Kgs and is rated at 1.4Kw.
Installation requires a two step process where the vernier plate is first removed from the starter motor and secured to the bell-housing.
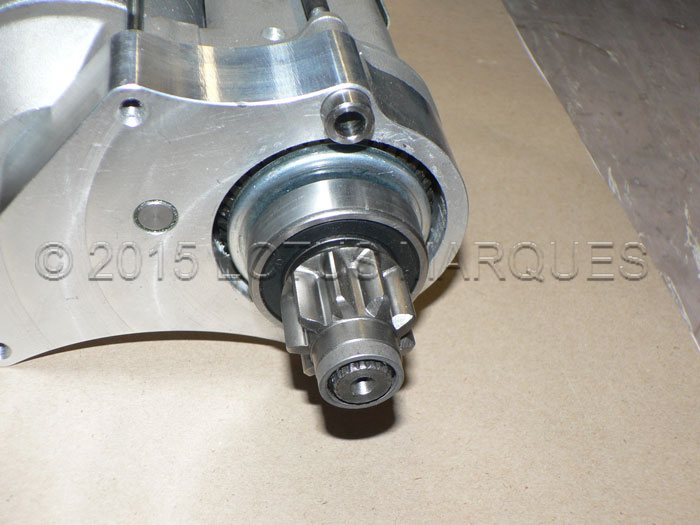
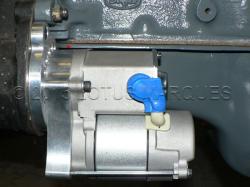 High torque starter motor for Lotus twin cam
  Cylinder block to vernier plate clearance
The vernier plate is secured to the stater motor by two 6mm Allen screws running inside 10mm locating dowels.
The locating dowels are more than capable of handling the torque load experienced in the shear-plane.
These screws should be unfastened with an ball-ended Allen key to separate the plate from the motor.
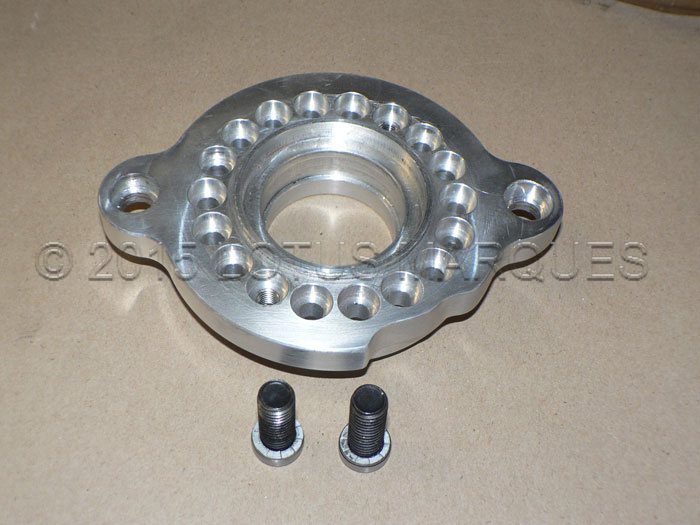
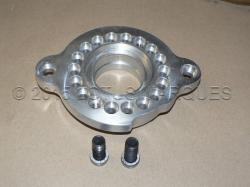 Vernier plate and 3/8" UNC allen screws
 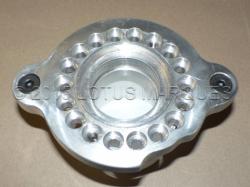 Alen screw heads flush with surface
Shallow head cap screws and washers should sit just bellow the vernier plate surface.
 Dummy install plate and check clearance
 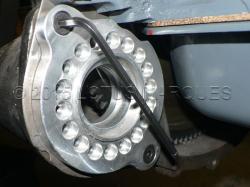 Tighten cap screws with allen key
Be careful when separating the starter motor from the vernier plate not to disturb the location dowels and pinion gear.
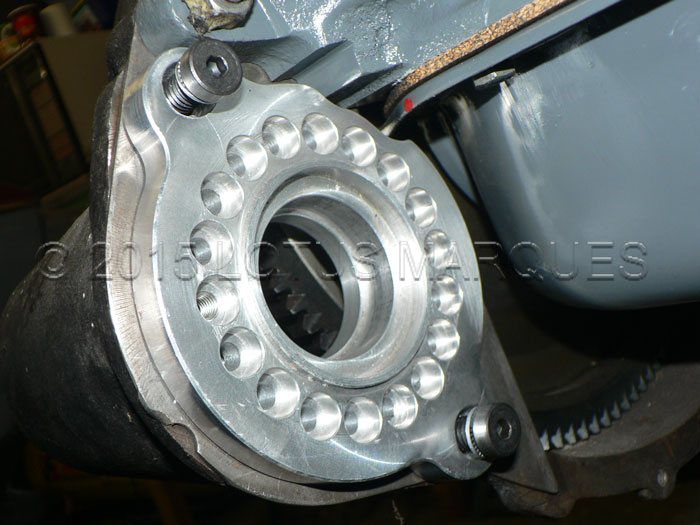
 Starter motor removed from vernier plate
 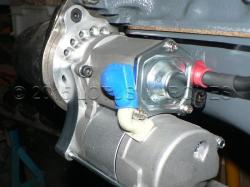 High torque starter secured to bell-housing
The battery cable needs to be pre-installed before securing motor to the vernier plate.
NOTE - There is only one position where the dowel holes contain Heli-coils for the 6mm Allen screws to fasten.
With every starter motor, there are two Allen keys supplied to assist in the installation.
The Allen keys are ball-ended to make it easy in accessing the fastener heads at awkward angles.
To install the new starter motor you will need to first remove the original Lucas unit.
Please inspect the condition of the flywheel ring gear as there is no point fitting a new starter if the ring gear teeth are damaged or significantly worn.
To install the new unit you will need to carefully separate the vernier adapter from the main body.
This is achieved by undoing the two long 6mm Allen screws that run external to the body.
Be careful not to disturb component assembly when loosening the screws (do not remove these).
Once the vernier adapter plate has been removed, place the starter motor/solenoid assembly safely on a clean bench surface.
Be careful not to accidentally remove the pinion gear as there is a spring and ball bearing concealed behind it.
WARNING - If the spring or ball bearing is lost, then the pinion gear will not mesh correctly in the ring gear
Next fasten the vernier plate to the bell housing using the two 3/8"UNC Allen screws supplied.
Note - the 3/8"UNC screws have shake-proof washers concealed under the heads.
Be careful not to lose these washers.....................
Check the vernier plate does not foul the back of the sump pan.
If it does touch, then you may need to relieve the cut-out profile in the vernier plate with a file.
Next, fasten the motor unit to the vernier plate by tightening the 6mm long screws.
Assuming your Elan has the original wiring loom plus original starter solenoid (and the Lucas starter motor is about to be replaced)
1) Move the starter motor heavy duty cable at the solenoid and fasten it to the battery cable termination on the solenoid.
2) Run a new cable (30 Amp rating) from the solenoid connection on the high torque starter to the now vacant starter motor stud on the solenoid.
3) Leave the red and white coloured wire connected to the Lucas solenoid and do not connect directly to the new high torque starter motor solenoid.
Reason for modification - reduce maximum current flow through the ignition switch contacts when cranking the engine.
Note - the high torque starter solenoid resistance is typically 0.5 Ohms and this means it will pull 24 Amps.
Note - the original Lucas solenoid resistance is typically 2.4 Ohms and this means it will pull 5 Amps.
By daisy-chaining the solenoids as described above, the original ignition switch contacts and wiring loom will continue to operate safely/reliably.
Copyright © 2015 Lotus Marques
This compact high torque starter motor weighs in at 3.9Kgs and is rated at 1.4Kw.
Installation requires a two step process where the vernier plate is first removed from the starter motor and secured to the bell-housing.
 High torque starter motor for Lotus twin cam
 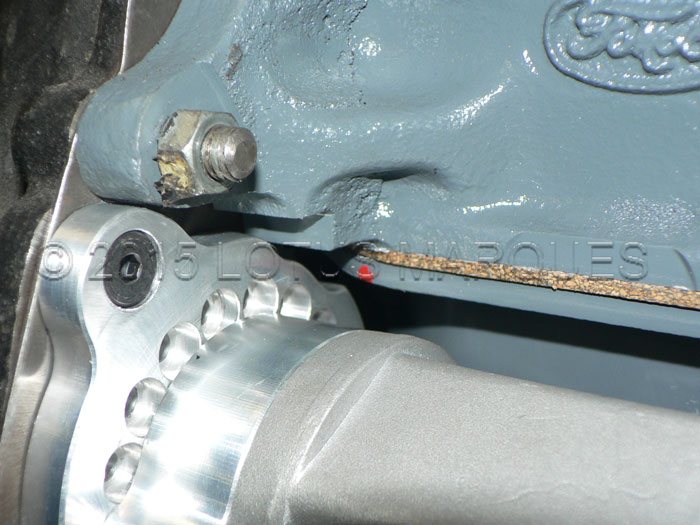 Cylinder block to vernier plate clearance
The vernier plate is secured to the stater motor by two 6mm Allen screws running inside 10mm locating dowels.
The locating dowels are more than capable of handling the torque load experienced in the shear-plane.
These screws should be unfastened with an ball-ended Allen key to separate the plate from the motor.
 Vernier plate and 3/8" UNC allen screws
 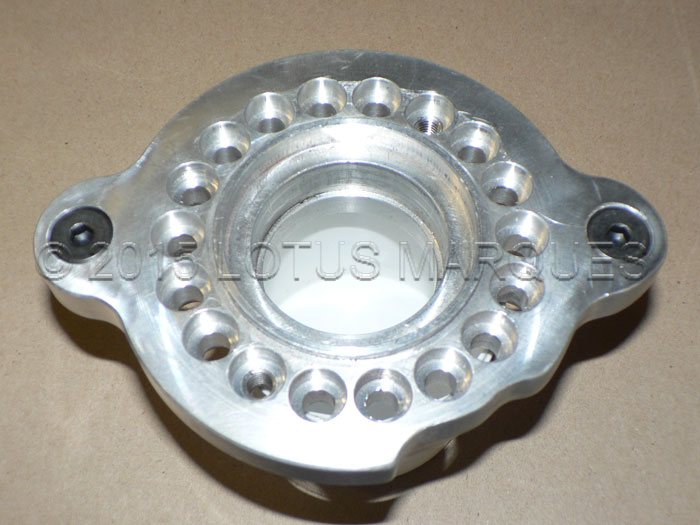 Alen screw heads flush with surface
Shallow head cap screws and washers should sit just bellow the vernier plate surface.
 Dummy install plate and check clearance
  Tighten cap screws with allen key
Be careful when separating the starter motor from the vernier plate not to disturb the location dowels and pinion gear.
 Starter motor removed from vernier plate
 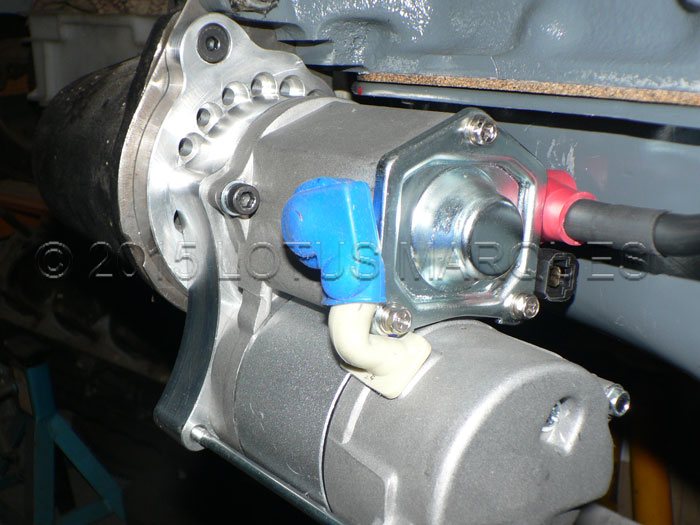 High torque starter secured to bell-housing
The battery cable needs to be pre-installed before securing motor to the vernier plate.
NOTE - There is only one position where the dowel holes contain Heli-coils for the 6mm Allen screws to fasten.
With every starter motor, there are two Allen keys supplied to assist in the installation.
The Allen keys are ball-ended to make it easy in accessing the fastener heads at awkward angles.
To install the new starter motor you will need to first remove the original Lucas unit.
Please inspect the condition of the flywheel ring gear as there is no point fitting a new starter if the ring gear teeth are damaged or significantly worn.
To install the new unit you will need to carefully separate the vernier adapter from the main body.
This is achieved by undoing the two long 6mm Allen screws that run external to the body.
Be careful not to disturb component assembly when loosening the screws (do not remove these).
Once the vernier adapter plate has been removed, place the starter motor/solenoid assembly safely on a clean bench surface.
Be careful not to accidentally remove the pinion gear as there is a spring and ball bearing concealed behind it.
WARNING - If the spring or ball bearing is lost, then the pinion gear will not mesh correctly in the ring gear
Next fasten the vernier plate to the bell housing using the two 3/8"UNC Allen screws supplied.
Note - the 3/8"UNC screws have shake-proof washers concealed under the heads.
Be careful not to lose these washers.....................
Check the vernier plate does not foul the back of the sump pan.
If it does touch, then you may need to relieve the cut-out profile in the vernier plate with a file.
Next, fasten the motor unit to the vernier plate by tightening the 6mm long screws.
Assuming your Elan has the original wiring loom plus original starter solenoid (and the Lucas starter motor is about to be replaced)
1) Move the starter motor heavy duty cable at the solenoid and fasten it to the battery cable termination on the solenoid.
2) Run a new cable (30 Amp rating) from the solenoid connection on the high torque starter to the now vacant starter motor stud on the solenoid.
3) Leave the red and white coloured wire connected to the Lucas solenoid and do not connect directly to the new high torque starter motor solenoid.
Reason for modification - reduce maximum current flow through the ignition switch contacts when cranking the engine.
Note - the high torque starter solenoid resistance is typically 0.5 Ohms and this means it will pull 24 Amps.
Note - the original Lucas solenoid resistance is typically 2.4 Ohms and this means it will pull 5 Amps.
By daisy-chaining the solenoids as described above, the original ignition switch contacts and wiring loom will continue to operate safely/reliably.
Copyright © 2015 Lotus Marques