

Restoring a Lotus Elan +2 to a high standard is going to be a lengthy process for any Lotus owner.


Just replacing worn parts for new does not necessarily result in a quality restoration.
The devil is in the detail and often a precise assembly sequence needs to be followed to obtain a quality result.
Unfortunately the Lotus workshop manual lacks sufficient information to confidently carry out many tasks.


Doors, boot, bonnet and glass need removing prior to lifting the body off the chassis.


 alt
alt  A quick sanding reveals layers of paint
The best way of removing paint on a Lotus Elan is by using plastic bead-blasting.
This is a gentle process and can remove paint in difficult corners and obscure recesses.


Getting the fibreglass body plastic bead-blasted is the first step to discover what previous repairs lie under the exterior paint.


The front right-hand front area directly behind the bumper bar shows the body has been in an accident.
The first step in this process is to remove the interior and remove the sixteen bolts that allow the body to be lifted off the chassis.


 Lotus twin cam engine still in chassis
  Lotus Elan +2 chassis and front suspension


After carefully bead-blasting the lower front suspension control arms, the true condition of these components is revealed.
The lower pairs of control arms are fabricated from 0.100" (2.50mm) mild steel and carry approximately one quarter of the vehicle weight.
The outer 7/16" diameter clearance hole locates the trunion at the bottom of the suspension vertical link.
The inner 1/2" diameter clearance hole locates the bottom of the coil-over shock absorber assembly.
With normal use these locating holes elongate as the mild steel control arm is too thin and unable to adequately handle the shock loads.
The above photographs show an amateur attempt to repair elongated shock absorber mounting holes by brazing in a mild steel plate.
Welding reinforcing washers to the trunion bolt holes is not a viable solution as this does not provide an adequate load bearing surface area.
Employing reinforcing washers still results in elongated holes - see photos.
The correct solution to this simple problem is to install high tensile steel inserts that presents a hard and increased bolt contact area.


The overall condition of these arms is quite good apart from the elongated holes so an effective repair is necessary.
From experience, these control arms can be rescued by installing appropriately machined steel inserts.
These stepped inserts are machined from steel to provide a hard contact surface for the bolts and crush-tubes.


Removing the ineffective reinforcing plates reveals capillary water attraction has taken place and in turn caused corrosion.
This is a sub-standard repair as there is still inadequate contact surface area for the bolts to spread the shock loads through the control arm.
Using a milling machine to cut oversize holes in the arms is the next step to installing the stepped high tensile steel inserts.

Checking the front hubs reveals a small amount of lateral run-out so a very light skim on a lathe is the remedy for this.
From experience, the front hub castings are not very uniform and would benefit from being balanced to ensure vibration free steering at high speed.

Upper left photograph shows the lower control arms complete with inserts and ready to be returned to service.

Checking the steering rack for truth reveals it has a 0.019" bend close to the middle of the teeth area.
As the rack is manufactured from mild steel and the teeth are only flame hardened, its possible to straighten the rack.


The cam cover has been bead-blasted in preparation for a fresh application of wrinkle-finish paint.
In addition to this, a new oil-tight alloy oil filler cap is supplied and installed by Lotus Marques.

 Lotus Elan +2 front brake calipers, rear view
  Lotus Elan +2 front brake caliper, front view
 Lotus Elan +2 front brake caliper, Girling 16P
 Lotus Elan +2 rear brake caliper, front view
  Lotus Elan +2 rear brake caliper, rear view


 Front of 120E cylinder block checking 77.62mm stroke crankshaft clearance
  Rear of 120E cylinder block checking 77.62mm stroke crankshaft clearance
 ARP stud kit installed in crankshaft main bearing caps
  Custom oil pick-up and stainless steel strainer 120E cylinder block
 Checking piston ring gaps and dummy install of piston and conrod
  Lotus 125E conrod and short compression height forged piston
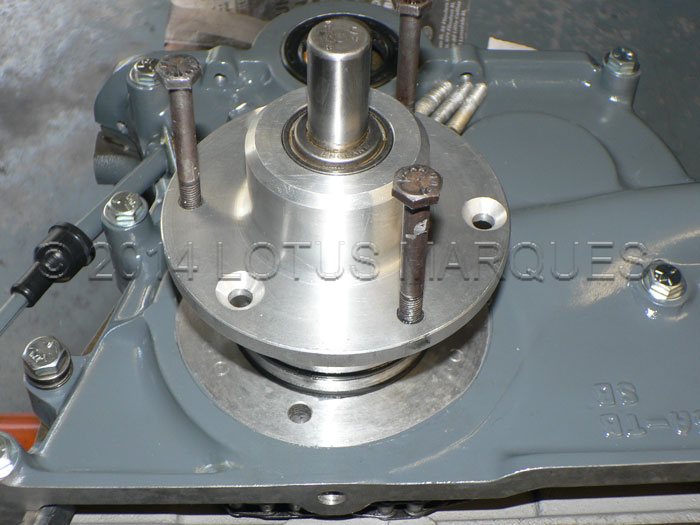
 Removable water pump manufactured by Lotus Marques, front view
  Removable water pump manufactured by Lotus Marques, rear view
 Trial fit timing chest and water pump module
 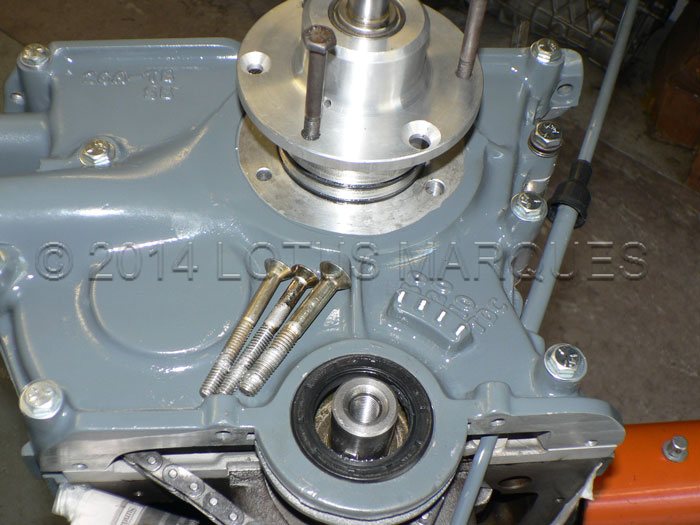 Anit-sieze compound applied to pump module fasteners
 Alternator mounting plate X050E6004Z installed

Copyright © 2013 Lotus Marques
