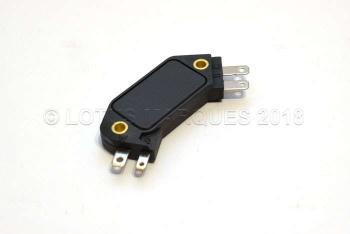
ELECTRONIC IGNITION MODULE INSTALLATION INSTRUCTIONS
Before attempting to fit this module, please ensure that the ignition is turned OFF.
1. Remove wiring and connectors from module. If necessary, note locations of connections to ensure correct re-assembly.
2. Remove mounting screws from module and retain for re-assembly.
3. Remove faulty ignition control module.
4. Clean the mounting surface of all grease and dirt.
5. The replacement module is supplied with a small amount of silicone heat transfer compound that must be used.
Cut a small corner off the sachet and squeeze the contents over the base of the new module.
Do not use any heat-sink compound on either the top or the terminals of the new module as-this could cause either the terminal connections or the earth screw to make incorrect contact and cause the module to fail.
The module will fail if this compound is not used on the base and will avoid any warranty claim.
6. Fit new module to base and ensure that any locating pins are correctly aligned.
7. Refit original mounting screws and tighten. Do not over-tighten screws as damage to the module will occur. No warranty claim will be accepted due to damage caused by over-tightened mounting screws.
8. Reinstall wiring and connectors to module ensuring that all terminals are clean and free from any signs of corrosion.
9. Refit any covers that may have been removed to expose the original